Easy Bold Russian Salad: The Crave‑Worthy Mix for Your Summer Table
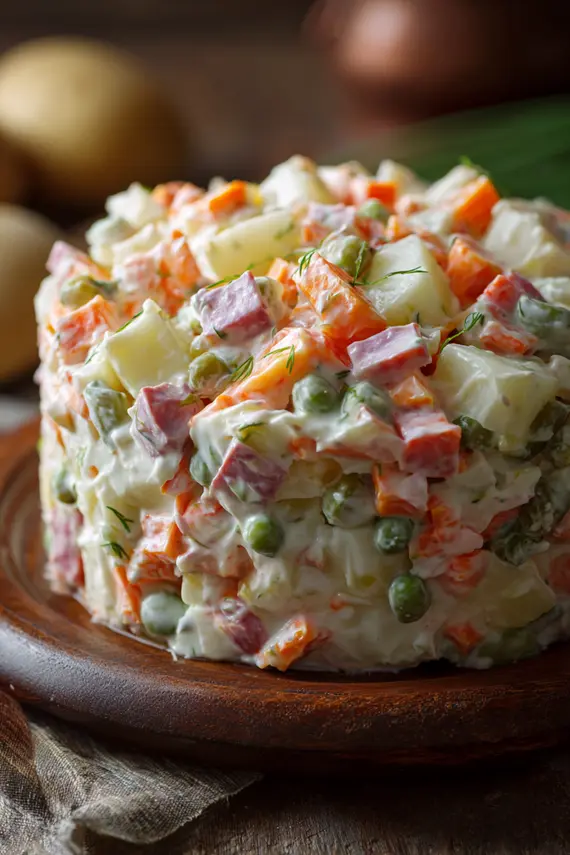
Russian salad is a classic potato-based dish that originated in Russia but has become popular in many parts of the world. This vibrant, colorful mixture combines tender potatoes, carrots, and peas with tangy pickles and a creamy mayonnaise dressing for a perfect balance of flavors and textures.
Whether you’re hosting a dinner party or preparing a hearty side dish for a family meal, this Russian salad recipe offers a delicious twist on traditional potato salad. Its combination of vegetables, proteins, and a rich dressing makes it a satisfying dish that can be served as an appetizer or a main course accompaniment.
The Rich History Behind Russian Salad
Origins and Global Popularity
Russian salad, also known as “Olivier salad” in many countries, has a fascinating history that dates back to the 1860s. It was first created by Lucien Olivier, a Belgian chef working at the Hermitage restaurant in Moscow. The original version was quite luxurious, containing ingredients like grouse, crayfish tails, and caviar alongside the vegetables.
Over time, Russian salad evolved to include more accessible ingredients, becoming a staple dish across Eastern Europe, Spain, Italy, and many Latin American countries. Each region has its own variation, but the core elements of potatoes, vegetables, and a creamy dressing remain consistent throughout these adaptations.
In the Soviet era, Russian salad became a must-have dish for New Year’s celebrations and special occasions. Today, it’s enjoyed year-round and has secured its place as a comfort food classic that brings people together around the table, demonstrating how a simple potato salad can become a cultural touchstone.
Essential Ingredients for an Authentic Russian Salad
Traditional Components and Modern Adaptations
The beauty of Russian salad lies in its harmonious blend of textures and flavors. Here’s everything you’ll need to create this beloved potato salad variation:
- 4 medium potatoes, boiled and diced
- 2 carrots, boiled and diced
- 1 cup frozen peas, thawed
- 3 dill pickles, diced
- 3 hard-boiled eggs, chopped
- 1 cup cooked ham, cubed
- 1 cup mayonnaise
- 2 tbsp sour cream
- Salt and black pepper to taste
- 1 small red onion, finely diced (optional)
- 2 tablespoons fresh dill, chopped (optional)
- 1 tablespoon Dijon mustard (optional)
- 2 tablespoons fresh lemon juice (optional)
- 1 apple, peeled and diced (optional)
- 2 tablespoons capers, drained (optional)
While the base ingredients create the classic Russian salad flavor profile, the optional additions can elevate the dish with extra dimensions of taste. The apple adds a subtle sweetness, while capers bring a briny punch that complements the pickles beautifully. Fresh dill is particularly authentic and adds a distinctive herbal note that’s characteristic of Eastern European cuisine.
For those preferring a meat-free version, you can easily omit the ham or substitute it with cooked chickpeas or white beans for protein. The beauty of this beet salad variation is its adaptability while still maintaining its distinctive character.
Crafting the Perfect Russian Salad: Step-by-Step Instructions
How to Make It Perfectly
Creating an authentic Russian salad requires attention to detail, particularly regarding the texture of the vegetables. Follow these steps for the best results:
- Boil potatoes and carrots in their skins until tender but not mushy. Test with a fork – there should be some resistance. Cool completely before peeling and dicing into uniform 1/4-inch cubes.
- Place frozen peas in a colander and rinse under cold water until thawed. Pat dry with paper towels to remove excess moisture.
- Hard-boil the eggs (place in cold water, bring to a boil, then simmer for 9 minutes). Cool in ice water, peel, and chop into small pieces.
- Ensure all ingredients are well-drained and at the same cool temperature before combining to prevent a watery salad.
- Combine diced potatoes, carrots, peas, pickles, ham, and eggs in a large bowl. If using optional ingredients like diced apple or red onion, add them now.
- In a separate bowl, whisk together mayonnaise, sour cream, salt, and pepper. For extra flavor, incorporate optional Dijon mustard and lemon juice at this stage.
- Pour the dressing over the salad ingredients gradually, folding gently with a spatula rather than stirring, to maintain the integrity of the diced components.
- Taste and adjust seasoning as needed, keeping in mind that the flavors will develop further as the salad chills.
- Cover and refrigerate for at least 2 hours, preferably 4-6 hours or overnight, to allow the flavors to meld together.
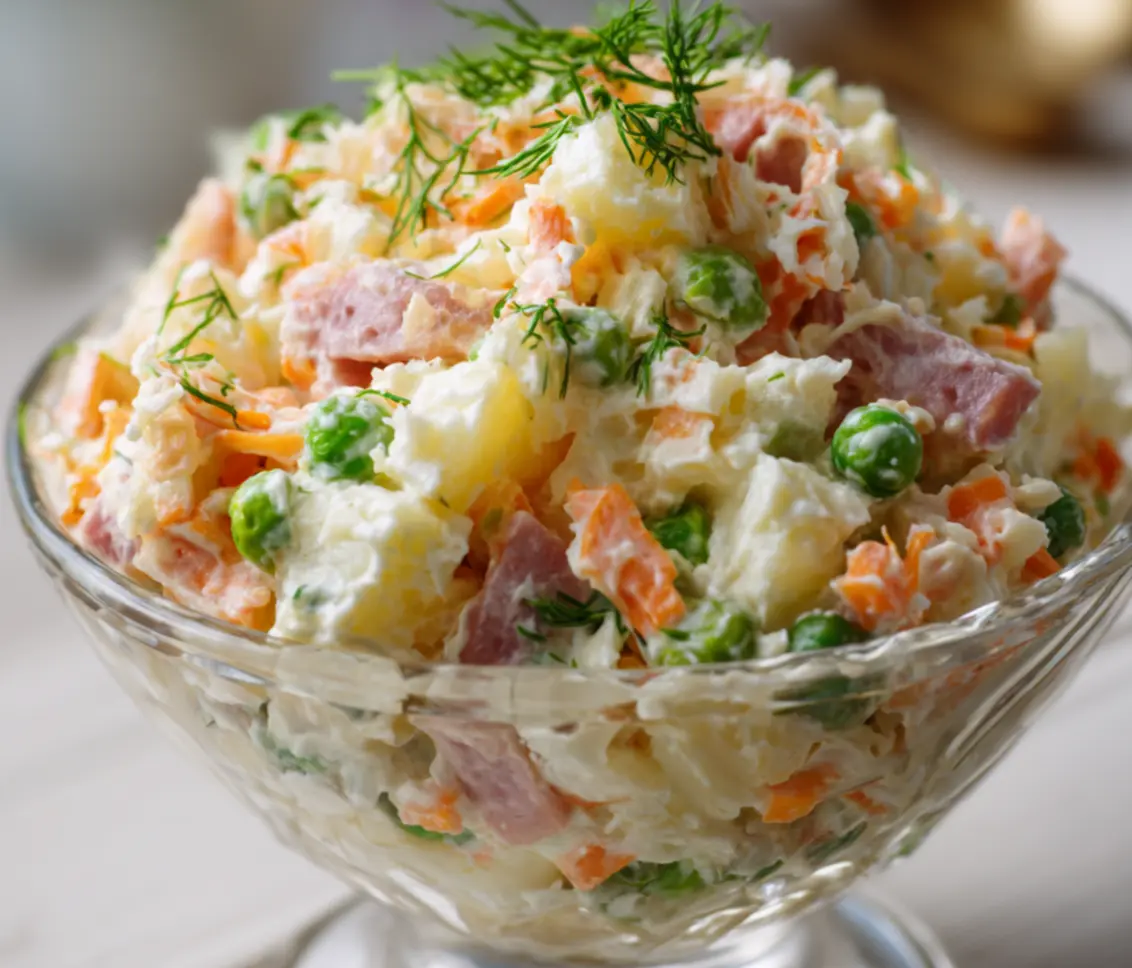
- Before serving, gently stir once more and garnish with fresh dill if desired.
The key to exceptional Russian salad is allowing time for the flavors to develop. This pickle salad variation truly benefits from being made ahead, making it perfect for busy hosts who want to prepare dishes in advance.
Tips & Variations for a Spectacular Russian Salad
Simple Ways to Customize the Recipe
Whether you’re adjusting for dietary preferences or simply want to put your own spin on this classic potato salad, these tips and variations will help you create the perfect Russian salad for any occasion:
- For the best texture, cook potatoes and carrots whole in their skins, then peel and dice after cooling – this prevents them from becoming waterlogged.
- Substitute the ham with smoked chicken, turkey, or even good quality canned tuna for different protein options.
- Create a vegetarian version by replacing meat with diced firm tofu marinated in soy sauce, or simply increase the egg content.
- For a tangier flavor profile, use half sour cream and half mayonnaise in your dressing, or try Greek yogurt for a lighter option.
- Add a Russian twist by incorporating diced beets, which will give your salad a beautiful pink hue and earthy flavor, transforming it into a true beet salad.
- For extra crunch, mix in diced celery, crisp apple, or even toasted walnuts.
- In summer, lighten up the dish by adding more fresh herbs such as parsley, chives, or tarragon alongside the traditional dill.
The versatility of Russian salad is one of its greatest attributes. Once you master the basic formula, you can easily adapt it to use seasonal produce or accommodate different dietary needs without losing its essential character.
Salad Dressings That Pair Well With Russian Salad
Complementary Homemade Dressings
While the traditional mayo dressing is delicious, you might want to experiment with alternative options that can highlight different aspects of this versatile potato salad:
- For a Mediterranean twist, try a Creamy Feta Dressing with Greek Yogurt that adds tangy notes while reducing the heaviness of traditional mayonnaise.
- A zesty Homemade Lemon Mustard Dressing pairs beautifully with the potatoes and adds a bright, fresh element to contrast with the earthy vegetables.
- For a lighter option with a pleasant tang, consider an Homemade Apple Cider Vinegar Salad Dressing which complements the pickles in the salad while cutting through the richness.
These alternative dressings can transform your Russian salad experience, especially if you’re looking to reduce calories or create a dairy-free version. Each dressing brings its own character to the dish while still honoring the traditional flavor harmony.
What to Serve With Russian Salad for a Complete Meal
Perfect Main Dish Pairings
Russian salad works beautifully as both a side dish and a standalone meal. Here are some ideal companions to create a well-balanced feast:
For a traditional Eastern European meal, serve Russian salad alongside grilled or roasted meats like chicken Kiev, beef stroganoff, or simple grilled sausages. The coolness of the salad provides a refreshing contrast to hearty meat dishes.
Smoked fish, particularly salmon or trout, pairs exceptionally well with Russian salad, creating an elegant appetizer or light lunch option. The smoky flavors complement the creamy, tangy notes in the salad.
For a vegetarian spread, combine Russian salad with roasted vegetable dishes and a Mediterranean Quinoa Salad for a nutritionally complete meal offering varied textures and flavors.
Breads and Accompaniments
Good quality crusty bread or traditional Russian black bread makes an excellent accompaniment, perfect for scooping up the salad or cleaning the plate afterward.
For a summer picnic or casual gathering, serve Russian salad alongside other cold dishes like deviled eggs, vegetable crudités, or charcuterie for an easy, no-fuss spread that allows guests to create their own combinations.
During winter months, pair this hearty potato salad with a warming borscht or mushroom soup for a comforting meal that honors Eastern European culinary traditions.
Storage and Make-Ahead Tips for Russian Salad
How to Store It Safely
Russian salad is actually better when made ahead of time, making it perfect for meal prep and entertaining. Here’s how to properly store and maintain its quality:
Store Russian salad in an airtight glass or BPA-free plastic container in the refrigerator for up to 3 days. The flavors will continue to develop during the first 24 hours, often making it even more delicious on day two.
If you plan to make this potato salad in advance for a party, consider preparing all components but keeping the dressing separate until 2-4 hours before serving. This preserves the best texture in the vegetables while still allowing flavors to meld.
Avoid freezing Russian salad, as the mayonnaise-based dressing will separate upon thawing, and the vegetables will lose their desirable texture. Instead, prepare smaller batches that can be consumed within the 3-day window.
For food safety, never leave Russian salad at room temperature for more than 2 hours, or 1 hour if the ambient temperature is above 90°F (32°C). At outdoor events, place the serving bowl in a larger container filled with ice to keep it properly chilled.
When serving from a larger batch over multiple days, use clean utensils each time to prevent introducing bacteria that could cause premature spoilage. You may need to refresh the salad with a small amount of additional mayo dressing if it seems dry after storage.
FAQs About Russian Salad
Is Russian salad actually from Russia?
Yes, Russian salad originated in Moscow in the 1860s. It was created by Lucien Olivier, a Belgian chef working at the Hermitage restaurant, which is why it’s also often called “Olivier salad.” The original recipe was quite different from today’s version, featuring luxury ingredients like grouse, caviar, and crayfish tails. During Soviet times, the recipe evolved to include more accessible ingredients, becoming the potato-based salad we know today.
Can I make Russian salad vegetarian or vegan?
Absolutely! For a vegetarian version, simply omit the ham and increase the egg content, or substitute with plant-based proteins like chickpeas or white beans. To make vegan Russian salad, omit both ham and eggs, and use vegan mayonnaise as the base for your dressing. Adding extra pickles, capers, or olives can help maintain the savory depth of flavor that meat typically provides.
Why is my Russian salad watery after storing?
Watery Russian salad usually results from not properly cooling and drying the ingredients before mixing. Ensure all vegetables are cooled completely after cooking and pat them dry with paper towels. Drain pickles well before dicing. Another common cause is not cooking potatoes properly—overcooking makes them release more moisture during storage. If your salad becomes watery, you can drain off the excess liquid and refresh it with a small amount of fresh mayo dressing before serving.
The Universal Appeal of This Classic Potato Salad
Final Thoughts
Russian salad stands as a testament to how simple ingredients can create something truly greater than the sum of their parts. This beloved potato salad has transcended its origins to become a global favorite, adapting to local tastes while maintaining its core identity.
What makes Russian salad particularly special is its versatility. Whether served as an elegant appetizer on crisp lettuce leaves, a substantial side dish alongside grilled meats, or even as a sandwich filling, it delivers consistent satisfaction. The combination of tender potatoes, sweet carrots, bright peas, tangy pickles, and creamy mayo dressing creates a perfect balance that appeals to almost everyone.
As you master this recipe, don’t be afraid to make it your own. The foundation of Russian salad is strong enough to accommodate personal touches while still honoring tradition. Whether you’re discovering it for the first time or revisiting a childhood favorite, this iconic beet salad variation offers both comfort and culinary adventure in equal measure.
Other Salads to Try
Authentic Russian Salad (Olivier)
Ingredients
Equipment
Method
- Boil potatoes and carrots in their skins until tender but not mushy, about 20-25 minutes depending on size. Cool completely.
- Peel and dice the potatoes and carrots into uniform 1/4-inch cubes.
- Thaw frozen peas by placing them in a colander and rinsing under cold water. Pat dry with paper towels.
- Hard-boil the eggs, cool in ice water, peel, and chop into small pieces.
- In a large bowl, gently combine diced potatoes, carrots, peas, pickles, ham, and eggs.
- In a separate bowl, whisk together mayonnaise, sour cream, salt, and pepper until smooth. Add optional Dijon mustard if using.
- Pour the dressing over the salad mixture gradually, folding gently with a spatula to maintain the integrity of the ingredients.
- Taste and adjust seasoning as needed.
- Cover and refrigerate for at least 2 hours, preferably 4-6 hours or overnight, to allow flavors to develop.
- Before serving, gently stir once more and garnish with fresh dill if desired.
Notes
- For best results, make this salad a day ahead to allow flavors to meld completely.
- All ingredients should be diced to a similar size for the best texture and appearance.
- If making for a special occasion, reserve some of the colorful ingredients to create a decorative pattern on top.
- For food safety, never leave this salad at room temperature for more than 2 hours.
Healthy Eating Guides & Meal Plans
10 fresh homemade dressing recipes with photos, storage tips & nutrition info

Custom weekly meal plans based on your goals

7-day beginner vegan meal plan with grocery list